


Content
- 1 Understand the Root Causes of Air Leaks in Pneumatic Components
- 2 Routine Inspection: Detect Leaks Early
- 3 Clean Compressed Air: Prevent Contamination-Related Leaks
- 4 Component-Specific Maintenance: Preserve Airtight Seals
- 5 Correct Installation and Operation: Avoid Preventable Leaks
- 6 Troubleshoot Persistent Leaks
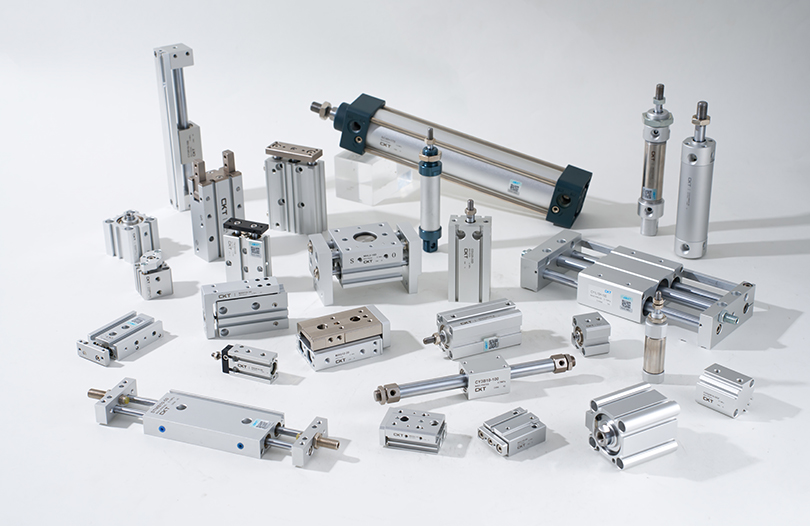
Air leaks in pneumatic control components (e.g., cylinders, solenoid valves, fittings, hoses) are a major issue for industrial systems—they waste 20–30% of compressed air (per ISO 10099), reduce system pressure, and increase energy costs. Preventing leaks requires a proactive maintenance routine tailored to the unique design of pneumatic parts, which rely on tight seals, clean air, and structural integrity. Below is a step-by-step guide to maintaining key components and eliminating leak risks.
Understand the Root Causes of Air Leaks in Pneumatic Components
Before maintenance, identify common leak sources to target efforts effectively. Most leaks stem from 4 core issues:
Seal Degradation: O-rings, gaskets, or lip seals (made of nitrile, Viton, or polyurethane) wear out from friction, temperature cycles, or chemical exposure—creating gaps between mating surfaces.
Contamination: Dust, oil, or moisture in compressed air scratches seal surfaces, clogs valve ports, or corrodes metal fittings—breaking airtight connections.
Mechanical Damage: Improper installation (over-tightening fittings), vibration (loosening fasteners), or physical impact (denting cylinders) deforms components, disrupting seals.
Aging Components: Hoses harden/crack over time (especially in high-temperature environments), and solenoid valve diaphragms lose elasticity—failing to block air flow completely.
Targeting these causes in maintenance reduces leak frequency by 60–70%, per industry studies.
Routine Inspection: Detect Leaks Early
Regular inspections (weekly for critical systems, monthly for general use) catch small leaks before they escalate. Use these methods to identify problem areas:
A. Visual Inspection
Check key components for obvious signs of leaks or damage:
Fittings and Connections: Look for oil residue (from compressed air lubrication) around threaded joints, quick-connect couplings, or flange connections—oil collects where air escapes.
Hoses and Tubing: Inspect for cracks, kinks, or bulges (especially near bends or fittings). Hardened hoses (brittle to the touch) or discolored seals (indicating chemical degradation) need replacement.
Cylinders: Check the rod seal (at the cylinder rod exit) for air bubbles or oil drips—leaks here often appear as a thin mist during cylinder movement.
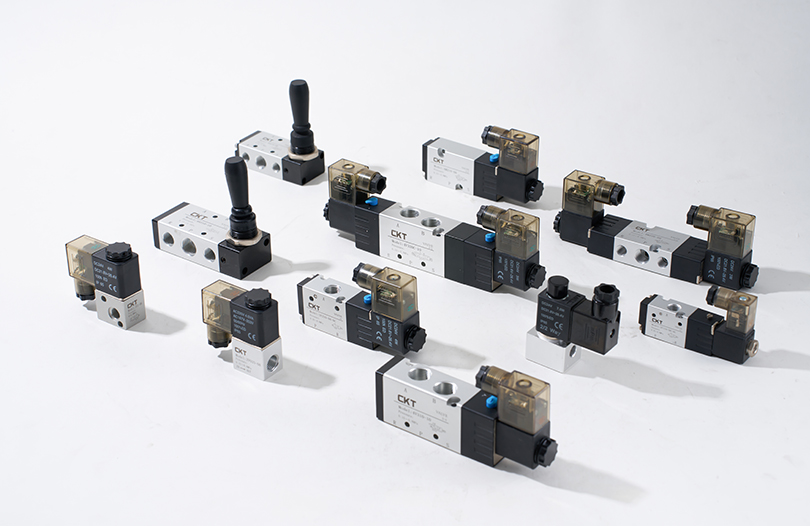
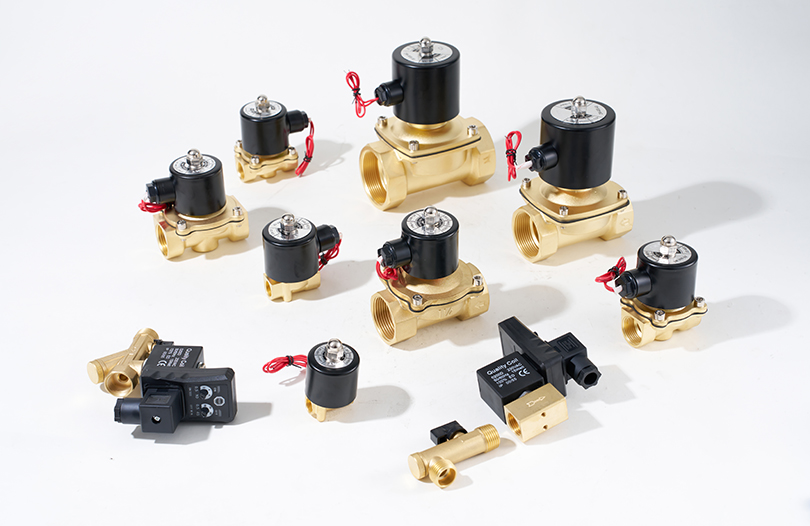
Solenoid Valves: Look for air escaping from exhaust ports when the valve is “closed”—this signals a worn diaphragm or stuck spool.
B. Acoustic Detection
Air leaks produce a high-pitched hiss (audible for leaks >0.1 L/min). For noisy environments:
Use a ultrasonic leak detector (portable devices that convert leak sounds to visual/audible alerts). Focus on:
Threaded fittings (e.g., NPT, BSP) on regulators, filters, or valves.
Quick-connect couplings (common leak points due to worn O-rings).
Cylinder end caps (where the piston seal meets the cylinder wall).
Mark detected leaks with tape and prioritize repairs (critical systems first, e.g., safety valves).
C. Pressure Drop Testing
For systems with stable air demand:
Close the main air supply valve to the system.
Record the initial pressure (e.g., 8 bar) in the system reservoir or header.
Wait 30 minutes (no air consumption).
If pressure drops by >5% (e.g., to <7.6 bar), a significant leak exists—use ultrasonic detection to locate it.
This method works best for closed-loop systems (e.g., pneumatic clamping systems) where air usage is predictable.
Clean Compressed Air: Prevent Contamination-Related Leaks
Contaminated air is the cause of premature seal failure. Maintain clean air supply with these steps:
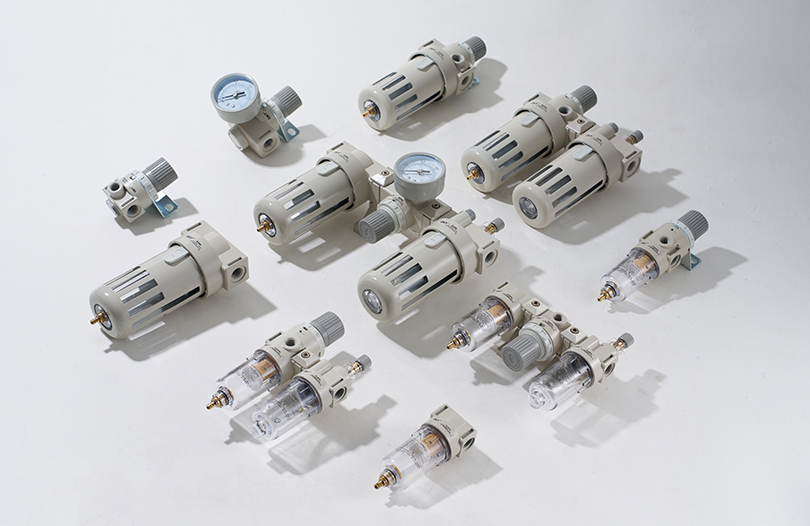
A. Maintain Air Treatment Units
Pneumatic systems rely on FRL units (Filter, Regulator, Lubricator) to clean and condition air—keep them in top shape:
Filter: Replace the filter element (5–10 μm for general use, 1–3 μm for precision valves) every 3–6 months, or when the pressure drop across the filter exceeds 0.5 bar (indicated by a pressure gauge or differential indicator). Drain condensed water daily (manual drain) or ensure automatic drains are functioning (test monthly).
Regulator: Check for air leaks around the adjustment knob—worn O-rings here allow air to bypass the regulator. Calibrate the regulator quarterly to ensure it maintains set pressure (e.g., 6 bar) without fluctuations (use a test gauge to verify).
Lubricator: Refill with pneumatic oil (ISO VG 32 or 46) to the recommended level (marked on the lubricator). Adjust the oil flow rate to 1–2 drops per minute (too much oil clogs valves; too little causes dry seal friction). Replace the oil filter annually.
B. Avoid Moisture Buildup
Moisture in compressed air causes corrosion and seal swelling. Add these safeguards:
Install a desiccant dryer (for systems in humid environments, RH >60%) and replace desiccant beads (silica gel or molecular sieve) when they turn from blue to pink (indicating saturation).
Slope air lines slightly (1–2% gradient) toward drains to prevent water pooling—pooled water flows into components, damaging seals.
Component-Specific Maintenance: Preserve Airtight Seals
Different pneumatic components require targeted care to maintain their airtight design:
A. Fittings and Couplings (Most Common Leak Points)
Threaded Fittings (NPT, BSP):
Disassemble and inspect every 6 months. Clean threads with a wire brush to remove old thread sealant (PTFE tape or anaerobic sealant).
Reassemble with fresh sealant: Use 2–3 wraps of PTFE tape (clockwise, avoiding the first thread to prevent clogging ports) or a thin layer of anaerobic sealant (cures in 24 hours, resistant to vibration).
Do not over-tighten: Tighten until snug, then add 1/4–1/2 turn (over-tightening strips threads or deforms seals).
Quick-Connect Couplings:
Replace the O-ring (inside the coupling) every 3–4 months (use the same material as the original: nitrile for general use, Viton for high temperatures).
Clean the coupling socket with a lint-free cloth before connecting—dust here scratches the O-ring, causing leaks.
Avoid side loads (pulling on hoses) when connected—this misaligns the coupling, breaking the seal.
B. Hoses and Tubing
Reinforced Hoses (PVC, polyurethane, or rubber):
Replace hoses every 2–3 years (or sooner if exposed to temperatures >60°C or chemicals). Use hoses rated for the system’s maximum pressure (e.g., 10 bar for general use, 16 bar for high-pressure systems).
Secure hoses with clamps or cable ties to avoid vibration (vibration rubs hoses against sharp edges, causing cracks). Keep hoses away from hot surfaces (e.g., motors) to prevent hardening.
Rigid Tubing (aluminum or copper):
Inspect for corrosion (white/green deposits on copper) or dents—corroded tubing develops pinholes. Replace damaged sections and use tube cutters (not hacksaws) for clean, square cuts (uneven cuts create poor seal contact).
Use compression fittings correctly: Slide the ferrule onto the tube, insert into the fitting, and tighten the nut until the ferrule compresses (1–2 turns past snug).
C. Cylinders
Rod Seals and Piston Seals:
Lubricate the cylinder rod weekly with a thin layer of pneumatic grease (compatible with the seal material) to reduce friction—dry rods wear seals quickly.
Replace rod seals every 12–18 months (or if leaks are detected). When disassembling, clean the cylinder bore with a lint-free cloth (avoid scratching the surface) and install new seals with a seal installer tool (prevents twisting, which creates gaps).
Check for rod bending: A bent rod (caused by side loads) misaligns the piston, wearing the piston seal. Use a straightedge to verify rod straightness—replace bent rods immediately.
End Caps:
Tighten end cap bolts evenly (in a crisscross pattern) to ensure uniform pressure on the end cap seal—loose bolts create gaps. Inspect bolts for corrosion (replace if rusted) and use lock washers to prevent vibration loosening.
D. Solenoid Valves
Valve Spools and Diaphragms:
Clean valve ports every 6 months (for valves in dusty environments). Disassemble the valve, remove the spool, and wipe ports with a solvent (e.g., isopropyl alcohol) to remove oil buildup or debris—clogged ports stick the spool, causing leaks.
Replace diaphragms (in poppet valves) or spool seals (in slide valves) every 18–24 months. Use OEM replacement parts (aftermarket seals may not fit precisely, creating leaks).
Electrical Connections:
Check for loose wires or corroded terminals—electrical faults cause the valve to stay partially open, leaking air. Tighten connections and apply dielectric grease to terminals to prevent corrosion.
Correct Installation and Operation: Avoid Preventable Leaks
Even well-maintained components leak if installed or used incorrectly. Follow these best practices:
A. Installation Tips
Align Components: Ensure cylinders, valves, and fittings are aligned with the air flow path—misalignment (e.g., a tilted cylinder) creates uneven pressure on seals, wearing them out. Use alignment tools (e.g., straightedges) for precision.
Use Proper Tools: Use torque wrenches to tighten fittings to manufacturer specifications (over-tightening damages threads; under-tightening leaves gaps). Avoid pliers (they scratch fitting surfaces, breaking seals).
Test After Installation: Pressurize the system to 80% of maximum pressure and check for leaks with soapy water (apply a thin layer to connections—bubbles indicate leaks). Fix leaks before full system operation.
B. Operational Best Practices
Avoid Pressure Surges: Gradually increase system pressure (over 5–10 seconds) when starting up—sudden pressure spikes (e.g., from opening the main valve quickly) damage seals and valves.
Limit Cycle Frequency: Cylinders or valves cycling more than 10 times per minute wear seals faster—use larger components (e.g., a bigger cylinder) to reduce stress, or add a buffer tank to stabilize pressure.
Train Operators: Ensure staff do not yank hoses, over-tighten fittings, or use incompatible lubricants (e.g., motor oil instead of pneumatic oil)—operator error causes 30% of avoidable leaks.
Troubleshoot Persistent Leaks
If leaks reoccur despite maintenance, address these root causes:
Material Mismatch: Ensure seal materials are compatible with system fluids (e.g., Viton seals for oil-based lubricants, nitrile for water-based fluids)—incompatible materials swell or shrink, creating leaks.
Vibration Control: Install vibration dampeners (rubber mounts) on pumps, compressors, or large cylinders—excessive vibration loosens fittings and deforms seals.
System Overhaul: For systems >10 years old, replace all critical components (hoses, valves, seals) at once—age-related degradation makes piecemeal repairs ineffective.
Maintaining pneumatic control components to avoid air leaks requires a combination of routine inspection, clean air supply, component-specific care, and proper operation. Key steps include:
Inspect weekly/monthly with visual, acoustic, and pressure tests to detect leaks early.
Maintain FRL units and dryers to prevent contamination.
Replace seals, hoses, and O-rings on schedule (3–24 months, based on component).
Install components with alignment and proper torque, and train operators to avoid damage.
By following this routine, industrial systems reduce air waste by 40–50%, lower energy costs, and extend component life by 2–3x—ensuring reliable, leak-free operation.


